
I found an entire bedroom set: Queen bed frame, 2 nightstands, and a dresser on Facebook marketplace for super cheap! They ended up being covered in this ugly brown spray paint-bleh! I wanted to sand them down and change them up and I’m so glad I did. The wood underneath ended up being gorgeous! I knew staining it would let the natural wood underneath show through so I decided to stain the top. I found inspiration on Pinterest in this pin. Although my pieces don’t have quite as many intricacies as this one did, it still turned out well!

Its from blesser house.com (not sponsored) But I love the idea and colors here so I took the inspiration and made it my own. I’ll show you how!
Supplies:
(I got them at Home Depot)
-CareFree Skies by Behr
-Varathane Weathered Oak Stain
-A Sander or Sand paper (I got a cheap $20 sander I use on all my wood projects)
-A stain brush or old t-shirt
-A Microfiber Rag
-…Antique wax
-Wax Brush
-a drill (to install new hardware)
-An old dresser or nightstand looking for a makeover
-Remember proper safety precautions as well: Eye goggles, face mask, plastic gloves, old (not baggy) clothes
You can always choose different paint or stain colors based on your preferences! I do think the antique wax finish looks best on a little brighter colors.
Step 1: Find Your Piece
Maybe you already have a piece or maybe you need a new dresser but don’t want to pay big bucks! Places I suggest looking: FB Marketplace, Estate Sales, Garage Sales & sometimes even the side of the road! Look for something that is solid but just has an ugly outside. You need to make sure its made of real wood. If a door is broken off and you don’t know how to fix that then you should probably go for a different piece. Some small things can be easy to fix but make sure you aren’t taking on too much-especially if its your first piece!

Step 2: Choose The Rest Of Your Supplies
As I listed above there are quite a few supplies needed for this fun project. The great thing about it is you are making it your own! So pick colors YOU like! Go down to Home Depot or your local hardware store and pick out your paint, stain, and antique wax. I just got a quart of paint which was plenty for my two nightstands.
I wanted to try to essentially recreate the above pin, although I did not choose the exact products, I found them expensive and difficult to find-I think its an older pin which could contribute to my issues!
Step 3: Prepare Your Piece.
Get on your old clothes, your work goggles, your mask, your sander, and of course your project piece. Now hopefully you have a garage or some kind of work space (or you can be like me and turn your apartment balcony into your work shop)!
Get to SANDING! This can be the most treacherous and strenuous part. It is dirty and can take a long time (longer the more intricate your piece is). There are a few parts you may have to do by hand if your sander doesn’t fit. But it is very gratifying to see your piece all cleaned up!

I was so happy with how beautiful the wood underneath was!
Step 4: Wipe Down Your Piece
Using an old towel or rag go ahead and wipe down the entire piece. There is a lot of dust everywhere after Step 3, it is important to clean everything off before the painting & staining phases. I even use the blow feature on my vacuum to help with this process.
Step 5: Stain the Top Portion of Your Piece
Once your piece has been properly wiped down, its time for the fun part! I love watching the Stain transform the wood and I got so excited I painted the top before taking a photo of it bare.

Step 6: Paint the First Layer of Paint on the Rest of Your Piece
If you have a steady hand then you can go ahead and Paint the rest of your piece. If you aren’t as confident in your stability then you should wait for the stain to dry, add painters tape and then start painting!
Step 7: Add Layers
After the paint and stain dries you will need to add extra layers until you are satisfied with the colors. Stain typically takes longer to dry than paint-wait at least 24 hours, although it can take longer if you live in higher humidity areas. I did 2 layers of the stain and paint and was happy with how they turned out! Each layer of stain makes a big difference, the lighter the paint the more layers you’ll need.
Note: Before adding layers of stain you need to “rough” it up again. Sand down the dried area a little so the stain will seep in for the second layer.
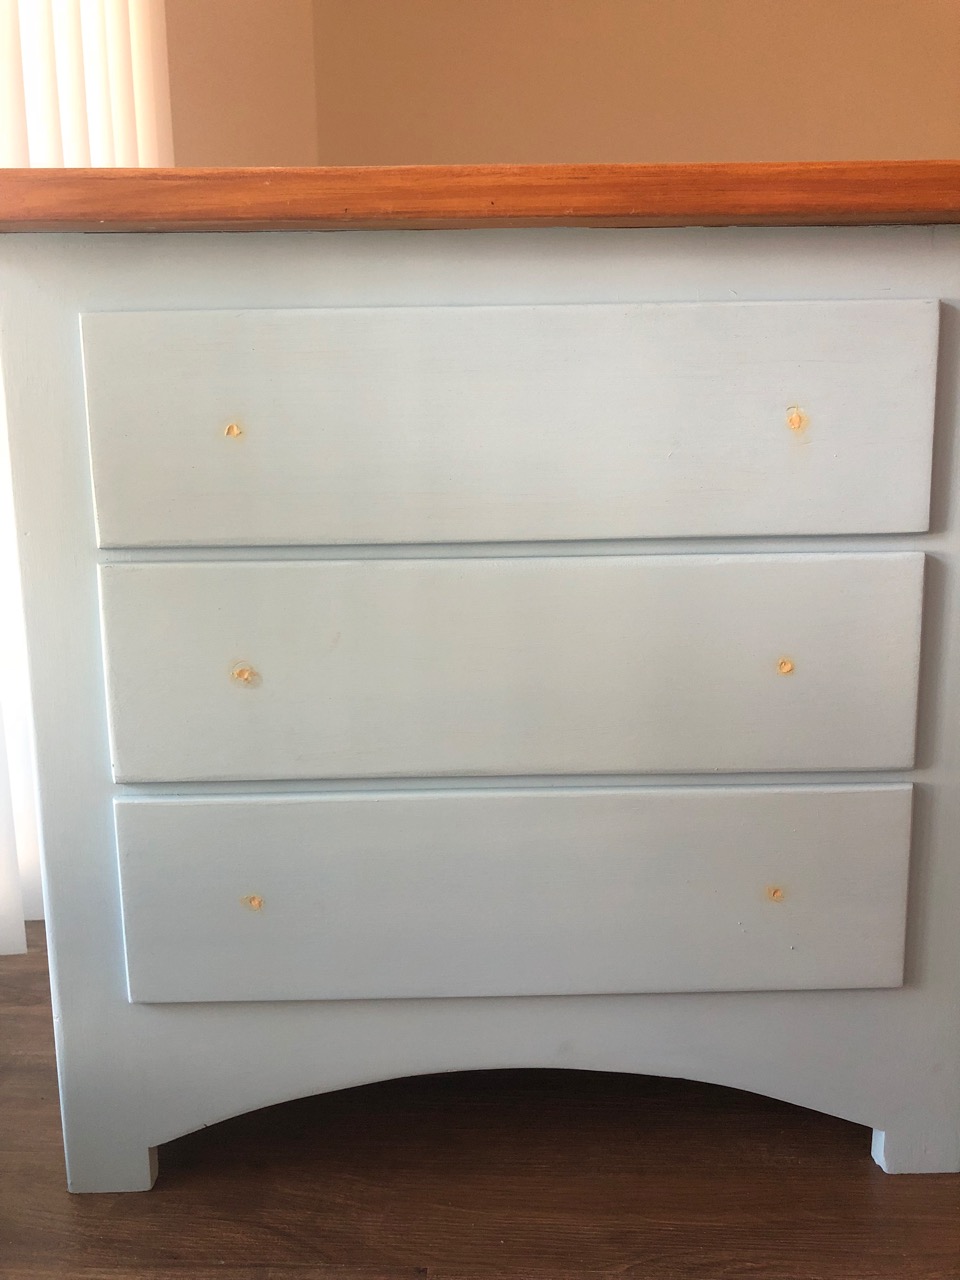
Since I decided to change out the location of the knobs I needed to fill in the old holes. I suggest doing this before you paint since it takes a while to dry and will need painted over as well!
Step 8: Touch Ups
Once the piece has dried and the colors are to your liking make sure everything is up to par. Make sure the corners are all painted and your knob holes are filled in and covered up.
Step 9: Rough it Up
Since we are antiquing the piece you need to make sure there are a few spots where the antique will stick more than others. You want to find the spot s that would have naturally gotten more wear: corners and edges in particular!
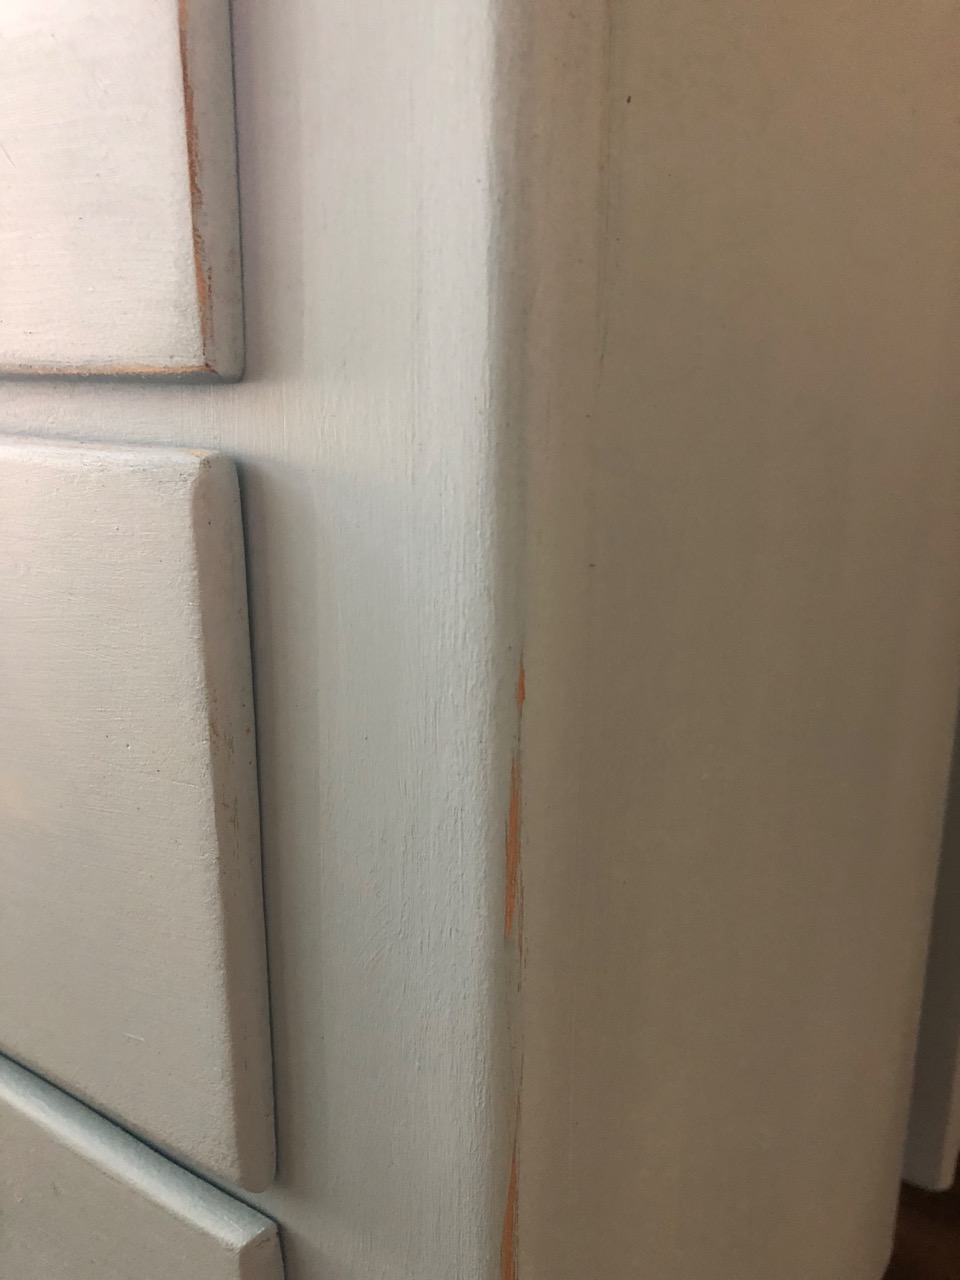
Step 10: Antique the Piece
This is the portion where you’ll need the micro-fiber rag and the antique wax. I find its easiest to learn this from youtube. I watched a couple but this one isn’t too long and gets the job done! Just be sure not to leave your wax on too long or it will remain dark and not come off too easily. Its easy to add more stain but not as easy to remove! I used a wax brush to apply it but I think an old t-shirt would work as well.
Step 11: Add the Hardware
I got my new hardware from Hobby Lobby- it goes half off every other week so look for the sale! Measure out the middle (if that’s where you want it) and screw it on with a drill-its super easy. It is so fun to add these finishing touches and watch the whole piece come together.
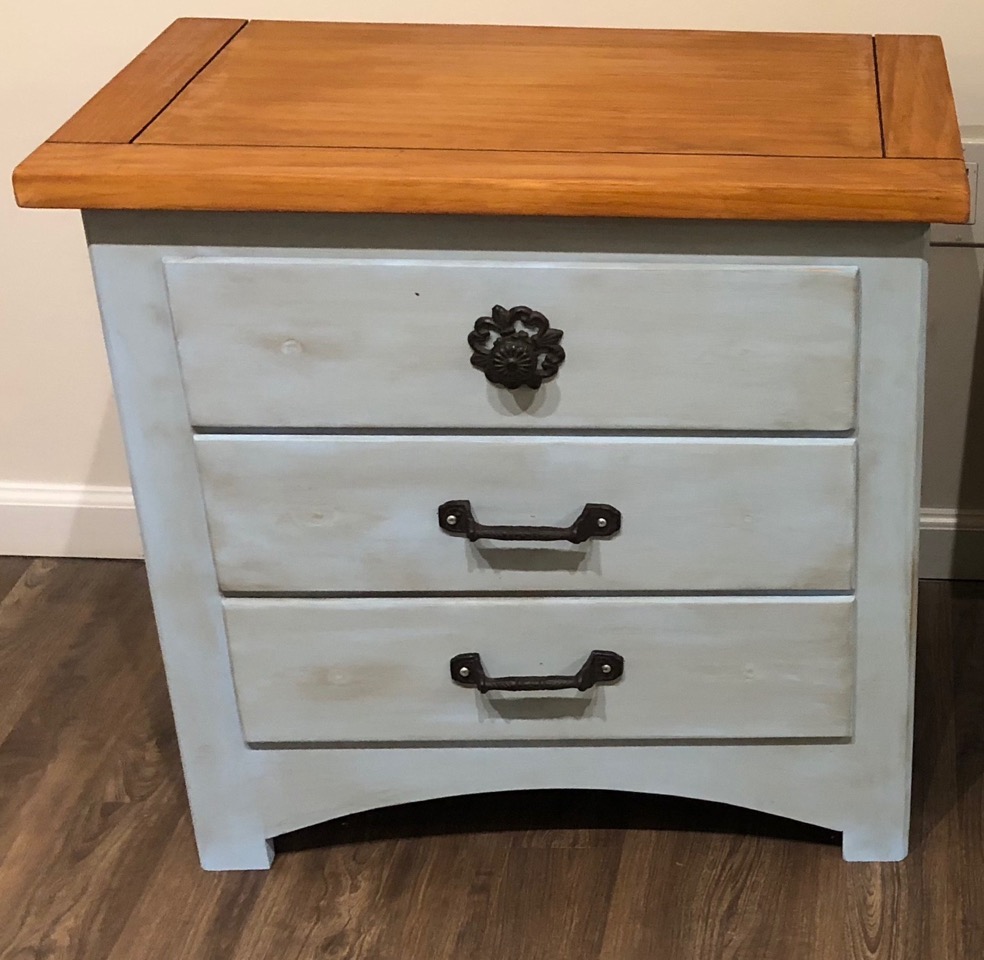
Wallah! Its done! I chose to add extra stain on the edges. I wiped the stain up and down on the sides of the piece.
Step 11: Add it to your room!
You’ve finished this project and now you get to add it to your room, Congrats! I decided not to add a layer of polyurethane to the top of my piece because I like the matte finish and it has worked out well so far. Just use your coasters!
Note: My piece was brown before and I left that in the cracks on top to add to the antique look.
 Taylor Tutorials